
[ad_1]

Before we begin, it should be noted that there have already been numerous articles published on this topic. However, I haven’t come across any tutorials that are easy for beginners to understand or any detailed instructions on how to deploy upgradeable contracts.
That’s what we’ll be learning today.
Proxy is a design pattern that lets you provide a substitute or placeholder for another object. A proxy controls access to the original object, allowing you to perform something before or after the request gets through to the original object.
In the blockchain world, anything which is written on the blockchain can’t be edited or manipulated. If developers make any mistake during smart contract development, then valuable funds are vulnerable to attacks. To prevent these mistakes proxy contracts are used, if any issues were found on the implementation contract then a new implementation contract will be deployed.
There are several types of proxy patterns available. They are
1) Transparent proxy pattern
2)Universal Upgradeable Proxy Standard (UUPS) pattern
3)Beacon pattern
But today we are going to see only the Transparent proxy pattern
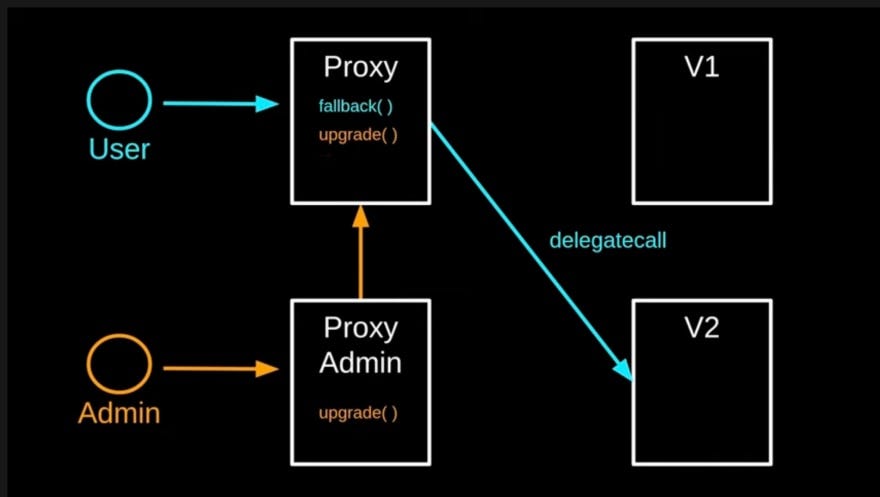
The transparent proxy pattern consists of three contracts.
- Proxy contract. The smart contract that the user interacts with. It will keep data/state which means data is stored in the context of this proxy contract account.
- Implementation contract. The smart contract provides functionality and logic. Please note that the data is also defined in this contract. This is the smart contract you are building.
- ProxyAdmin contract. The contract links Proxy and Implementation.
Let’s move on to the practical
Using the OpenZeppelin Upgrades plugin for Hardhat, we will deploy the upgradeable contracts.
Let’s start by creating a hardhat project
npm init -y
npm install — save-dev hardhat
npx hardhat
npm install @openzeppelin/hardhat-upgrades
Open hardhat.config.js and add the below statement
require(“@openzeppelin/hardhat-upgrades”);
Next, we will create a contract inside the contracts folder. For this example, we will be using a contract from Openzeppelin learn guide. You can get the code from this link.
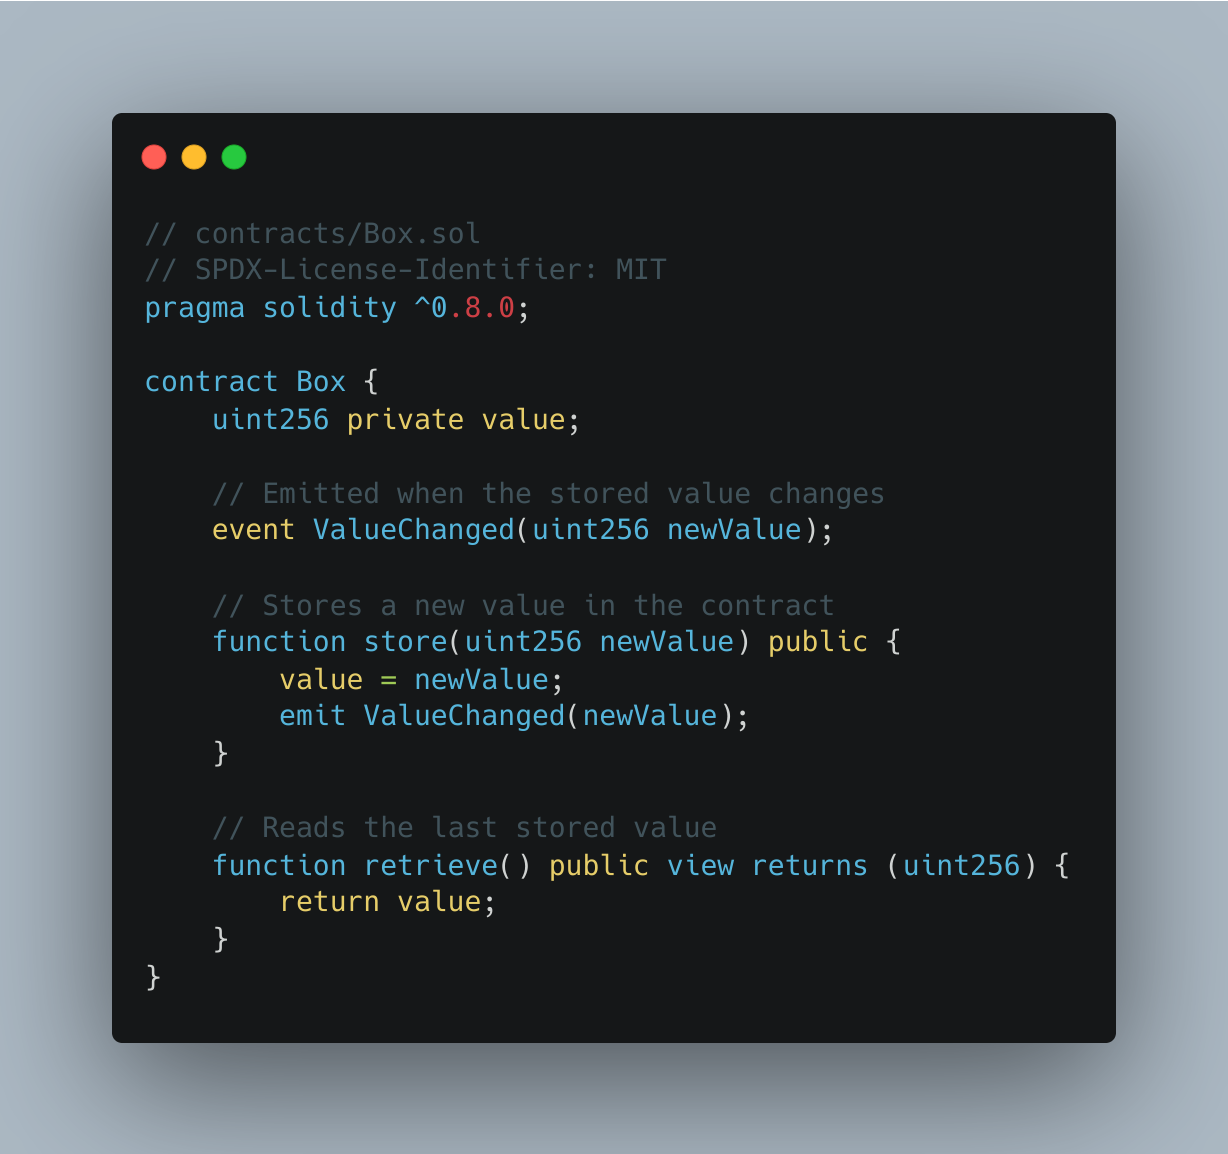
Let me describe what this contract does. Think of this contract as a box.

In the box, we can store some items and easily retrieve them. The same thing occurs here: a new value is stored using the store() function, and then it is retrieved using the retrieve() function.
Now let us deploy the contract.
To deploy a normal contract we use the deploy() method.
const Greeter = await ethers.getContractFactory("Greeter");
const greeter = await Greeter.deploy("Hello, Hardhat!");
But for the upgradeable contracts, we use the deployProxy() method.
const Box = await ethers.getContractFactory("Box")
const box = await upgrades.deployProxy(Box,[42],{initializer:'store' })
In the second line, we use the OpenZeppelin Upgrades plugin to deploy Box with an initial value 42 by calling store() as an initializer.
So, What is an initializer?
An initializer is a function that works like a constructor. It should have all the values that need to be initialized only once.
Now open the scripts folder, and create a file named deploy.js
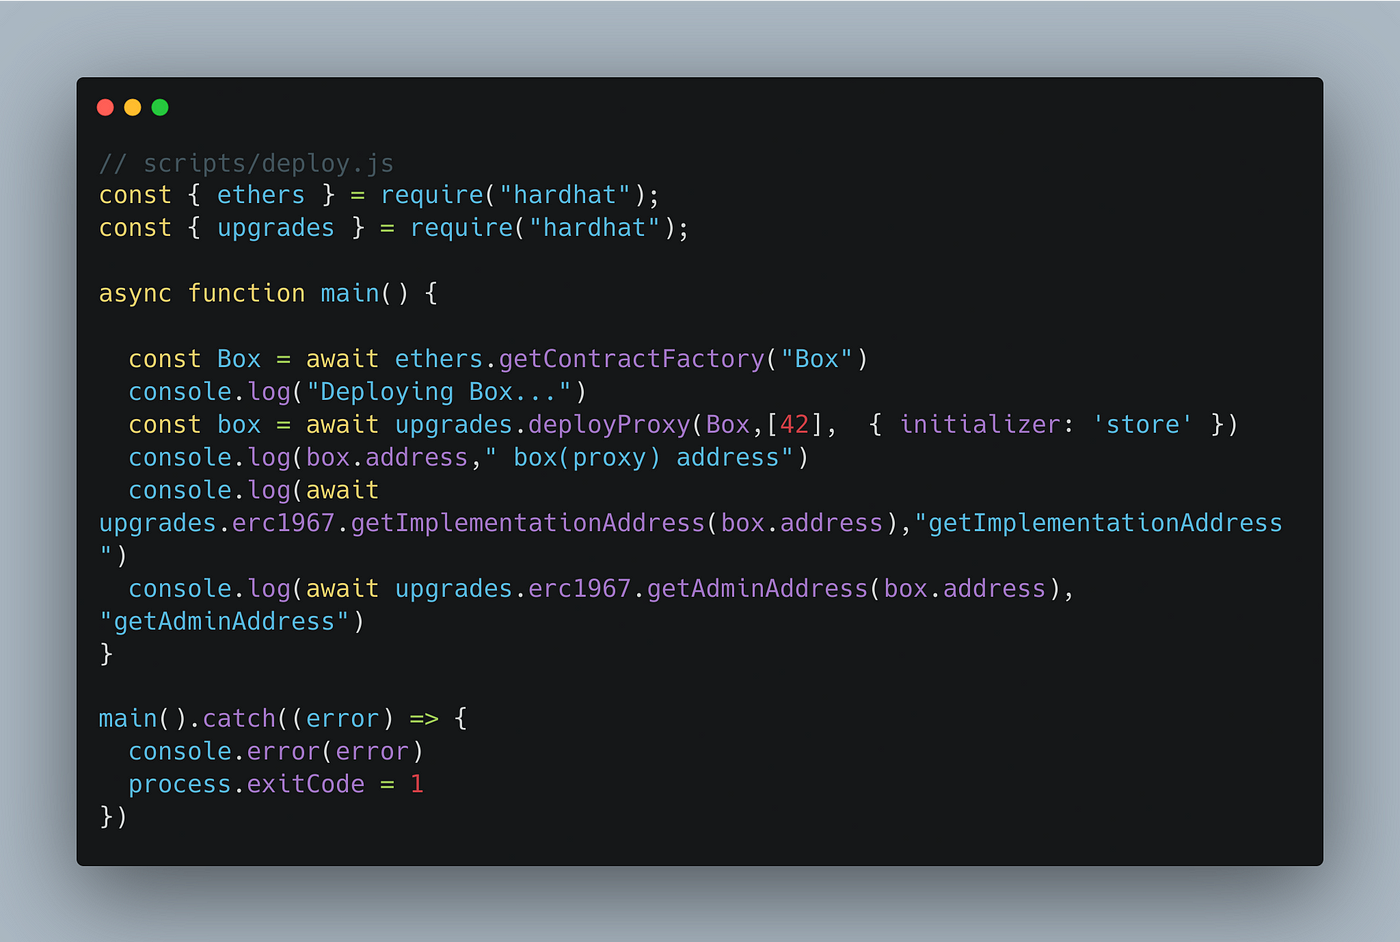
Your deploy script should be the same as above
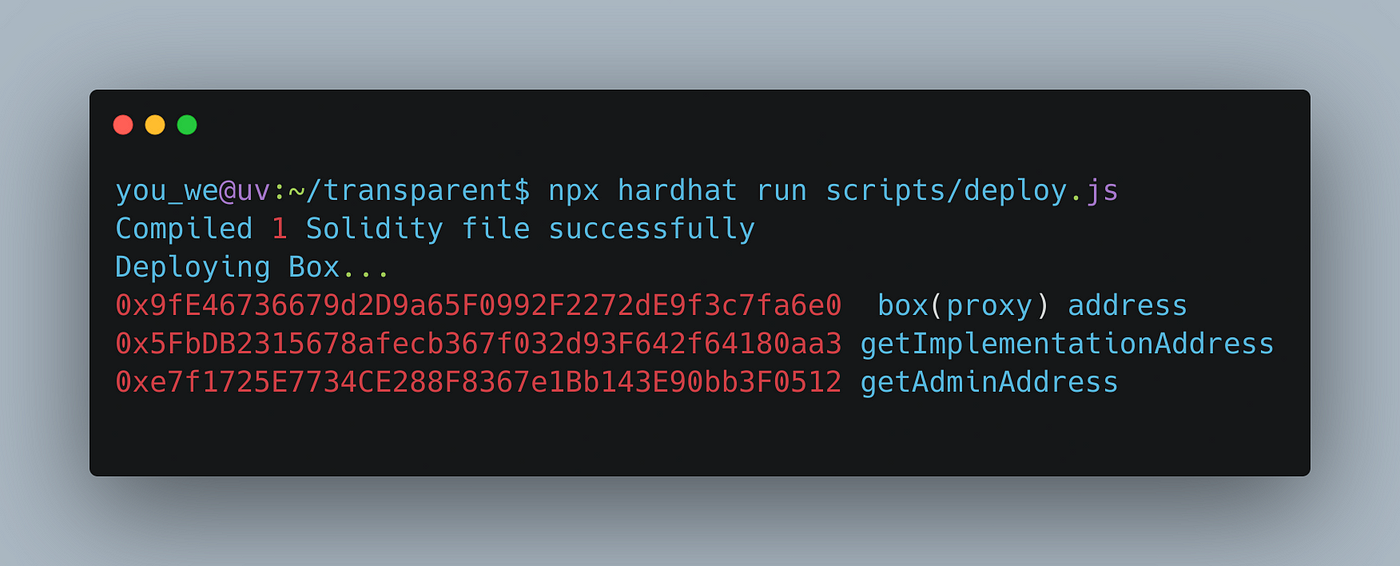
In the above script, we are deploying the contract using the deployProxy() method. Now run
npx hardhat run scripts/deploy.js — network loalhost
On the success of this command, three contracts will be deployed.
Important: It is important to note that, when testing you should deploy the contract on localhost or in any of the testnets, because hardhat’s local blockchain will be resetted everytime. As a result, if you try to upgrade your contract, it will deploy it on a fresh blockchain, our old deployed code won’t be there, and it will be a fresh block chain, so it will throw the below error.
Error: Contract at 0xabcde12345 doesn’t look like an ERC 1967 proxy with a logic contract address
Upgrade to version 2:
Let’s now make version 2 of the contract.
Create a new contract that inherits the Box contract. Here in this contract, we have created a new function called increment(). The purpose of this function is to increase the value stored in the value variable.

Now create another deploy script for version 2 in the scripts/ folder.

Here in the above script, we have used upgradeProxy() method, which accepts proxyAddress and new implementation contract address as arguments.
Now run,
npx hardhat run scripts/deployV2.js — network localhost

That’s it. This is how we have to deploy and upgrade our contracts.
Now if you look into the implementation address it will be changed, which means we have successfully deployed our new contract, and now we can interact with our new contract.
New to trading? Try crypto trading bots or copy trading
[ad_2]
Source link